There is something truly magical about a classic banana split. For me, it evokes sunny afternoons and carefree moments, especially those spent in my Portland kitchen. It is a dessert that whispers of childhood, of bright colors and joyful indulgence. The thought of all those delicious flavors coming together always brings a smile to my face.
Today, I am sharing a delightful twist on that timeless favorite. This no-bake banana split dessert captures all the essence of the original. It delivers those beloved flavors in a convenient, easy-to-make format. You will find it perfect for potlucks, family gatherings, or simply a sweet treat on a warm evening. No oven required, just pure, layered bliss.
I love how this recipe brings a touch of playful nostalgia to any table. It combines the fresh vibrancy of fruit with rich, creamy textures. Each spoonful offers a delightful surprise. It is a dessert that feels both familiar and exciting. It truly embodies the spirit of home cooking with a global-inspired flair, inviting everyone to savor a little piece of happiness.
This recipe is more than just a dessert; it is an experience. It is about creating joy with simple ingredients and a little bit of love. Join me as we embark on this sweet adventure. Let us make some unforgettable memories, one delicious layer at a time. This no-bake wonder will quickly become a cherished favorite in your recipe collection.

Crafting Your Perfect No-Bake Banana Split Ingredients
Creating this spectacular no-bake dessert starts with selecting the right ingredients. Freshness and quality make all the difference here. Gather these items and prepare for a wonderfully easy assembly.
- 2 cups graham cracker crumbs
- 1/2 cup melted butter
- 1/4 cup granulated sugar
- 2 (8 oz) blocks cream cheese, softened
- 1 cup powdered sugar
- 1 teaspoon vanilla extract
- 1 (8 oz) whipped topping (like Cool Whip)
- 3–4 bananas, sliced (slightly firm works best)
- 1 (20 oz) can crushed pineapple, very well drained
- 1 cup strawberry pie filling or mashed sweetened strawberries
- 1–2 cups whipped topping
- Chocolate syrup (for drizzling)
- 1/2 cup chopped peanuts or walnuts
- Maraschino cherries
Ingredient Spotlight:
Graham Cracker Crumbs: These crumbs form the sturdy, flavorful base of our dessert. They provide a wonderful texture contrast to the creamy layers. Look for fine crumbs for the best result. If you cannot find pre-crushed crumbs, simply crush whole graham crackers in a food processor or a plastic bag with a rolling pin. You can substitute vanilla wafer crumbs for a slightly different, yet equally delicious, flavor profile.
Cream Cheese: The heart of our creamy layer, softened cream cheese creates a rich, tangy base. Be sure it is truly softened to room temperature. This ensures a lump-free, smooth mixture. Cold cream cheese will result in a clumpy texture that is hard to blend. For a richer, albeit denser, alternative, you could try mascarpone cheese, but cream cheese offers the classic tang we desire.
Bananas: Fresh, slightly firm bananas are key for this dessert. They hold their shape beautifully when sliced and offer a pleasant texture. Avoid overly ripe bananas as they can become mushy quickly. While other fruits can be used, fresh bananas are essential for the traditional banana split experience. If you must substitute, consider firm peaches or berries, but acknowledge the flavor change.
Assembling Your Dreamy No-Bake Banana Split Layers
Get ready to build a masterpiece! This no-bake dessert comes together with simple layering. Follow these steps for a delicious treat.
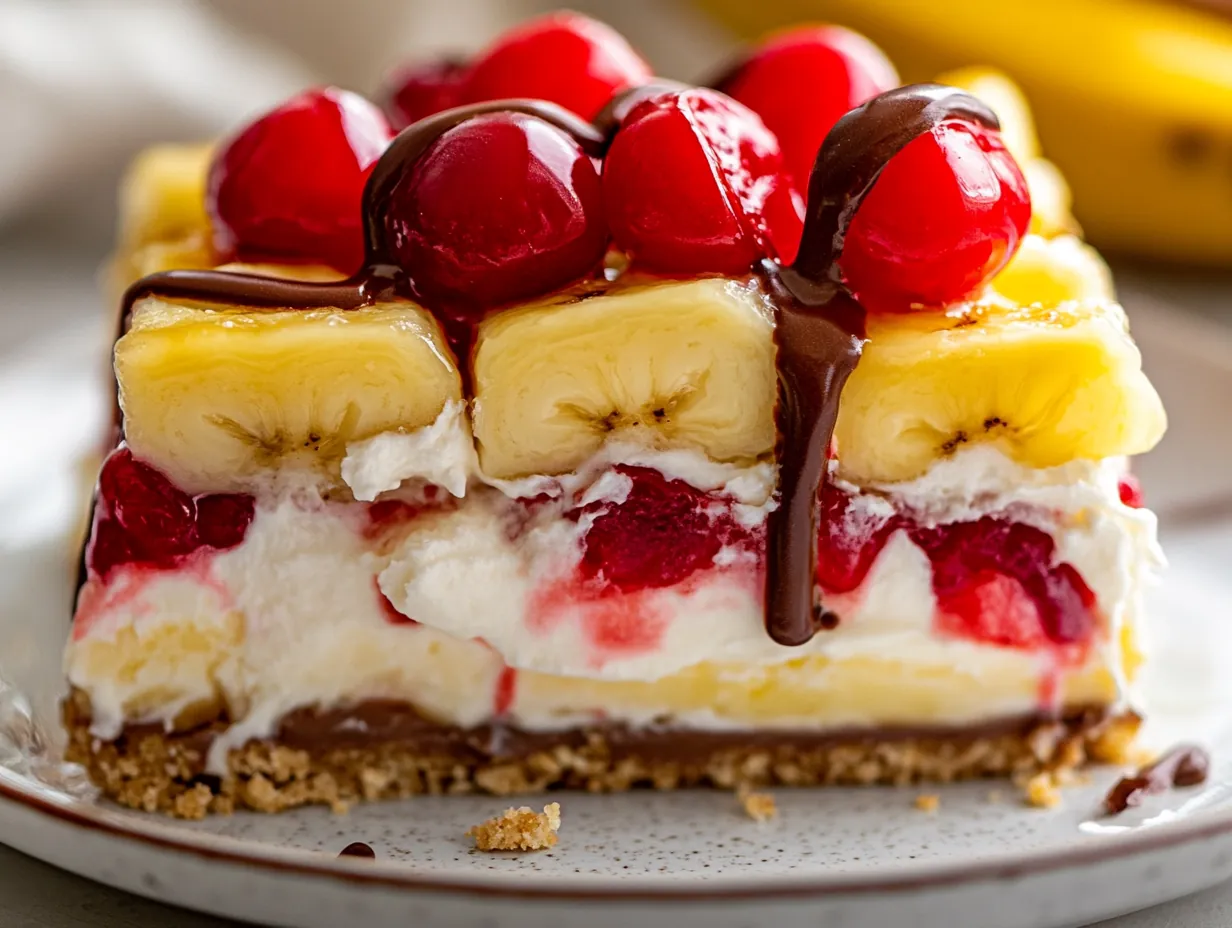
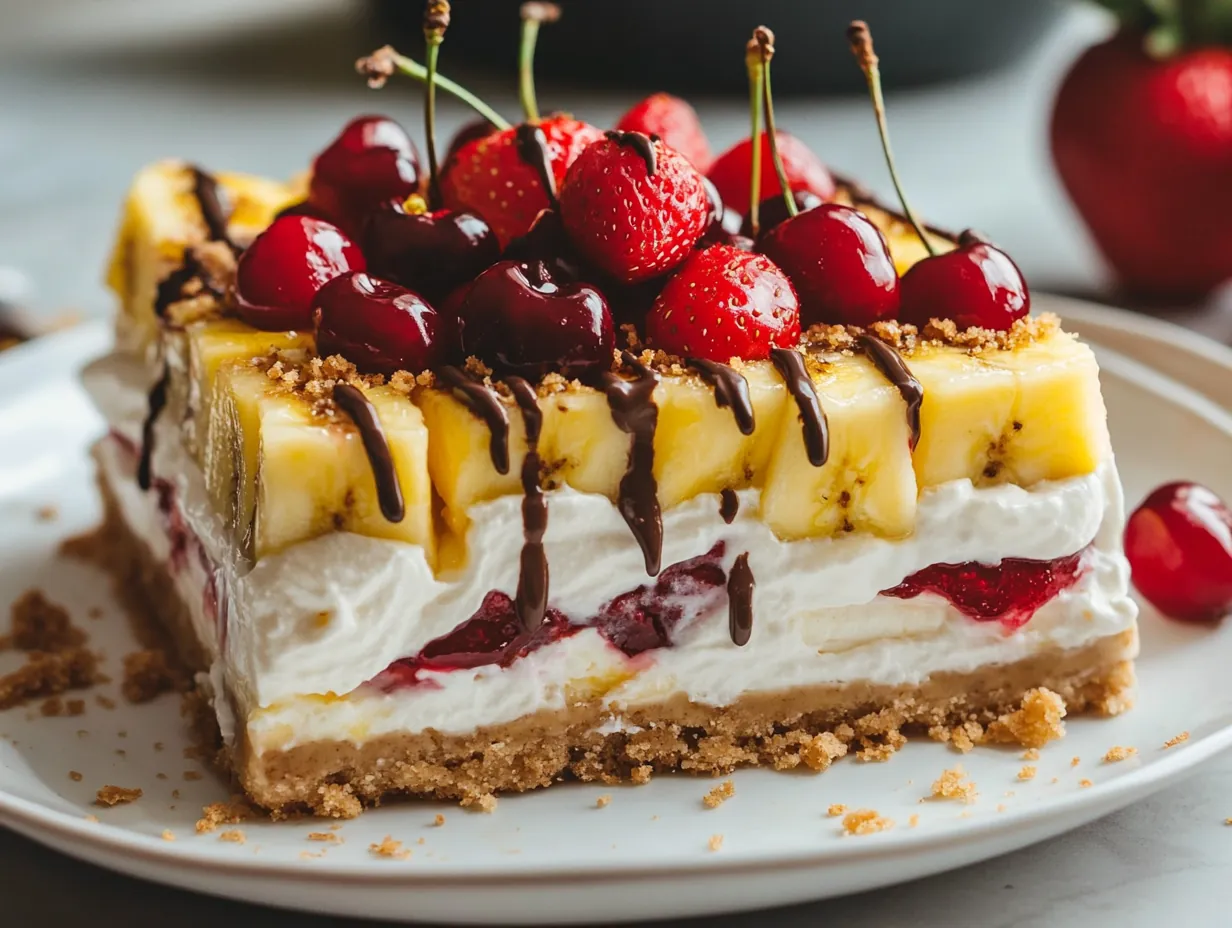
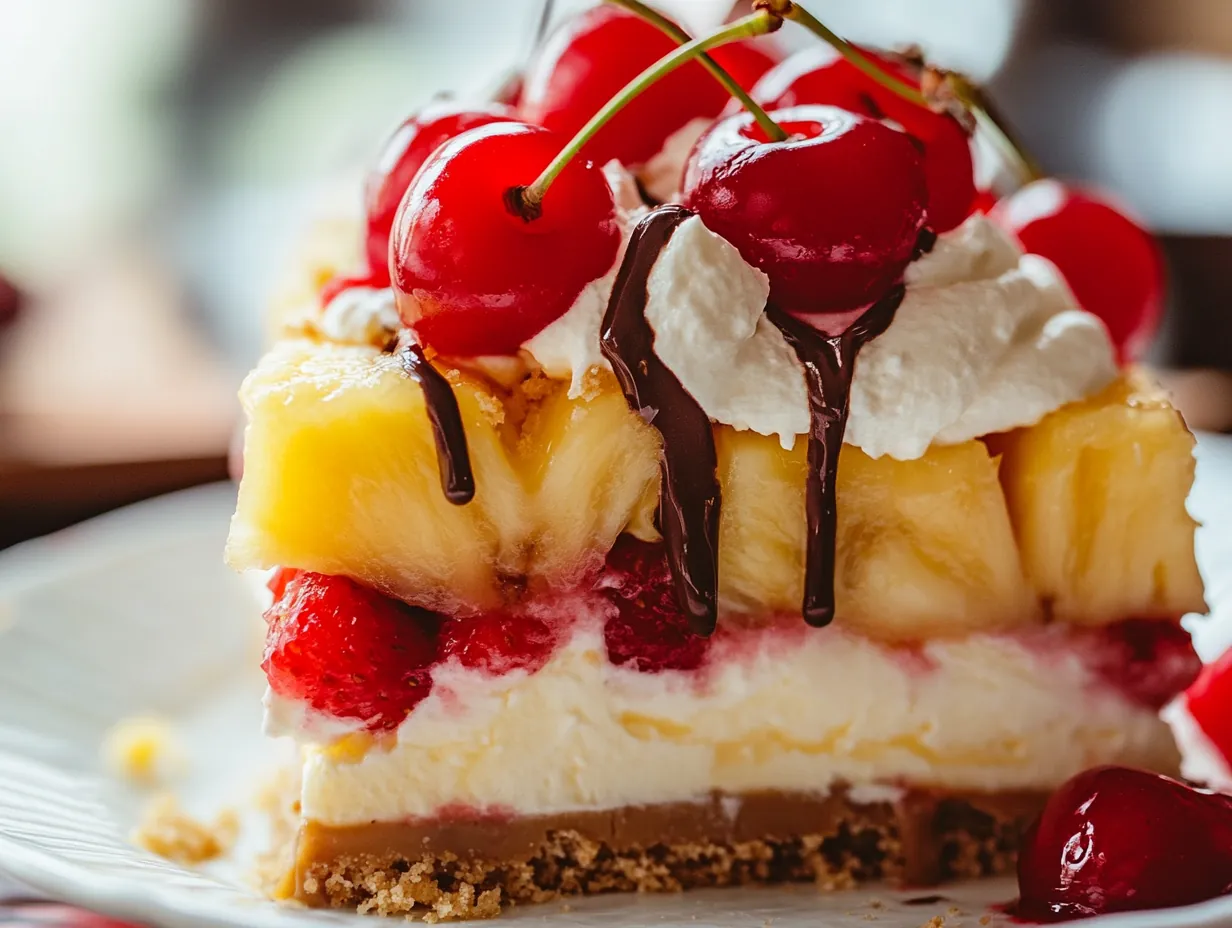
- Prepare the Crust: In a bowl, mix graham cracker crumbs, melted butter, and sugar until evenly combined. The texture should resemble damp sand. Press the mixture firmly into a 9×13-inch glass dish, making sure it’s even and compact, especially in the corners. Chill in the refrigerator for 20–30 minutes until set.
- Make the Cream Layer: In a large mixing bowl, beat the softened cream cheese until completely smooth and free of lumps. Add powdered sugar and vanilla extract, then mix until creamy. Gently fold in the whipped topping until light and fluffy.
- Assemble the Base Layers: Spread the cream mixture evenly over the chilled crust. Take your time to smooth it out without disturbing the crust underneath.
- Add the Banana Layer: Arrange banana slices along the edges of the dish first (this creates that pretty layered look when sliced), then spread the remaining slices evenly across the surface.
- Add Pineapple Layer: Spread the well-drained crushed pineapple evenly over the bananas. Avoid pressing too hard to keep layers intact.
- Add Strawberry Layer: Spoon and spread the strawberry filling over the pineapple layer. Keep it even but don’t overmix the layers.
- Top It Off: Spread a thick layer of whipped topping across the entire dessert. Drizzle generously with chocolate syrup, sprinkle chopped nuts, and place cherries evenly across the top.
- Chill and Set: Refrigerate for at least 4 hours, but overnight is best for clean slices and fully set layers.
- Serve Cold: Slice into squares and serve chilled. Use a clean knife between cuts for neat layers.
Creative Twists for Your No-Bake Banana Split Experience
This no-bake banana split dessert is wonderfully adaptable. Feel free to unleash your creativity and tailor it to your personal tastes. Here are some ideas to inspire your next dessert adventure.
My Creative Touch:
Tropical Escape: For a sunny, island vibe, swap the strawberry layer for a mango purée. You can also add a layer of shredded coconut flakes over the pineapple. A sprinkle of macadamia nuts on top instead of peanuts would complete this exotic transformation. This variation transports your taste buds straight to a warm beach.
Chocolate Lover's Dream: Indulge your chocolate cravings by using chocolate graham cracker crumbs for the crust. You could also swirl some chocolate fudge sauce into the cream cheese layer. Add mini chocolate chips or chocolate shavings as a topping. This makes an even richer, more decadent dessert for true chocolate fans.
Gourmet Pairings:
Sparkling Berry Lemonade: A refreshing, bubbly berry lemonade cuts through the richness of the dessert. Its bright, tangy notes provide a lovely contrast. The sweetness of the berries complements the fruit layers perfectly. This drink offers a delightful and palate-cleansing experience.
Vanilla Bean Ice Cream: Serve small scoops of premium vanilla bean ice cream alongside each slice. The creamy, cold ice cream adds another layer of indulgence. It melts beautifully into the dessert, creating an even more luxurious experience. This pairing is a classic for a reason.
Keeping Your No-Bake Banana Split Dessert Fresh
Proper storage ensures your delicious no-bake banana split dessert stays fresh and enjoyable for as long as possible. Here are the best ways to keep it.
Storage: Store any leftover dessert tightly covered with plastic wrap or aluminum foil in the refrigerator. This helps prevent it from absorbing refrigerator odors and keeps it moist. The dessert is best enjoyed within 2-3 days. After this time, the bananas may start to soften and brown. Enjoying it sooner ensures the best texture and flavor.
Freezing: Freezing this dessert is not recommended. The texture of the cream cheese layer can become grainy and separate upon thawing. Additionally, the bananas will turn very soft and watery after freezing and thawing. This will significantly diminish the overall quality and appeal of the dessert. It is truly a dessert meant to be enjoyed fresh from the refrigerator.
Reheating: This dessert is designed to be served cold. Reheating is not necessary or advisable. The delicate layers and fresh fruit are best enjoyed chilled. Attempting to warm it would melt the whipped topping and alter the creamy consistency. Always serve it straight from the refrigerator for the optimal experience.
Your No-Bake Banana Split Dessert Questions Answered
You have questions, and I have answers! Here are some common inquiries about making this wonderful no-bake banana split dessert.
Can I make this dessert ahead of time?
Absolutely! This dessert is an excellent choice for making ahead. In fact, it needs at least 4 hours to chill and set properly. Making it the day before you plan to serve it is ideal. An overnight chill allows all the flavors to meld beautifully and ensures perfectly clean slices. Simply cover it tightly and refrigerate.
How can I prevent the bananas from turning brown?
Bananas naturally brown when exposed to air. To slow this process, you can gently brush the banana slices with a very light coating of lemon juice or pineapple juice before adding them to the dessert. This creates a protective barrier. While they may still show some slight discoloration over time, this method helps keep them looking fresher longer. Using slightly firm bananas also helps.
Can I use different fruits in this no-bake dessert?
Yes, you certainly can experiment with other fruits! While it would no longer be a traditional "banana split" dessert, you could substitute the bananas and pineapple with sliced peaches, berries, or even kiwi. Just be sure to drain any canned or frozen fruits very well. Consider fruits that hold their shape and do not release too much liquid. This offers a fun way to customize the recipe.
And there you have it, friends! A delightful, easy-to-make No-Bake Banana Split Dessert that brings all the joy of a classic treat right into your home. It truly is a testament to how simple ingredients can create something extraordinary. I love sharing recipes that spark happiness and bring people together, and this one certainly does the trick.
I encourage you to give this recipe a try. Do not worry about perfection; the beauty of home cooking lies in the process and the love you put into it. This dessert is forgiving and utterly delicious, making it perfect for both seasoned bakers and kitchen newcomers. Just imagine those creamy layers and fresh fruit flavors!
I hope this recipe brings a little bit of sunshine and sweetness to your table. Please share your creations and experiences with me over on SavorDrift. I always adore seeing your culinary adventures. Happy cooking, my friends, and happy savoring!
Reader Reviews
This no-bake banana split was an absolute hit at our family gathering! So easy to throw together and tasted just like the real thing.
Loved this! It brought back so many childhood memories. I added a little extra whipped cream just because.
A fun and surprisingly quick dessert. The layers held up well, and my kids devoured it.
Seriously, this is genius! No oven needed and it's so delicious and pretty. Definitely making this again.
Such a clever way to get all the banana split flavors without the mess. It was a huge hit for our summer get-together.
This dessert is pure joy in a pan! So simple to assemble and the flavors are spot on. My inner child is thrilled.
A delightful and refreshing treat. I appreciated how adaptable it was; I swapped some of the toppings for what I had on hand.
Leave a Review